I speak from experience when I say I’ve put together and apart my pedalboard more times than I can count in my past decades playing guitar. I’ve gone from a full Star Trek starship to the bare minimum of a tuner, an overdrive, and a distortion.
Truth is, now that I feel I’ve reached some kind of balance, I’m thinking of changing it again.
Since I’m committed to rearranging it, I thought I could write something as I do it to help others avoid the mistakes I’ve made in the past. I tried my best to condense two decades of fiddling around faulty patch cables and Velcro into a single post.
These are the 10 worst mistakes you should avoid when setting up your new pedalboard.
I hope you find it works as a shortcut to a better pedalboard. Oh yeah, don’t worry, you’re more than welcome. Thanks for stopping by!
Table of Contents
- 1. You Don’t Have a Plan
- 2. You Don’t Have a Buffer (or Two)
- 3. No Gain Staging Plan
- 4. Not Leaving Some Room to Grow
- 5. Adding Unnecessary Pedals (Getting a Wrong-Sized Pedalboard)
- 6. Disregarding the Essentials
- 7. Let’s Talk Routing
- 8. You Don’t Know Enough About Your Signal Path
- 9. You Don’t Watch Out for Impedance-Sensitive Devices
- 10. You Don’t Take Risks and Just Try Stuff Out
- The Bottom End
1. You Don’t Have a Plan
The first rule of creating a new pedalboard is planning ahead. In fact, you can take this rule and apply it to any aspect of your life. Having a plan might take away from the fun of the surprise factor, but it sure does help to have better results.
Use a Blueprint or App
I usually do it on paper and take my time measuring everything before I even lay the first pedal on the pedalboard. But that’s just me, an old man that’s a non-tech-savvy pedal nerd.
Nowadays, these are the three best sites for you to plan it all with cool images and perfect measurements:
There, you can just add each of the pedals you need to do your thing and the site will recommend you either a specific pedalboard model from a specific brand or will give you the exact size you need to fit all your toys.
Plan The Pedalboard You Need, Not the One You Want
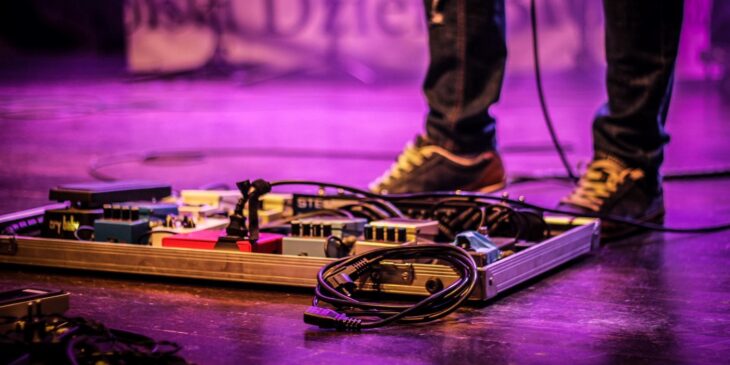
I know, we close our eyes and can immediately picture an interplanetary vessel with all the effects and gizmos we need to play ANY song in the world. Well, not all of us have the size and budget of Mr. John Frusciante to have a bigger-than-life pedalboard carried by four mighty roadies (see below).
So, my first piece of advice in that sense is to plan for the pedalboard you need, not the one you wish you had. How so? Well, very simply, you need to bear in mind ease of use, versatility, and power, but also portability and reliability.
I mean, having a six-feet pedalboard is not the best idea if you play small stages. Not only because of you, but so your bandmates can also perform.
The way I do it is this:
- I add the absolute basic pedals you need. For example, a Wah, a tuner, an overdrive, a distortion, a delay, and a modulation.
- I add pedals that are level 2, meaning those I occasionally use for colors and flavors.
- I check how much room you have left and either use it as a space to grow or put there the weirdo pedal you want to use from time to time.
Pedalboard Real Estate is Precious
A space on your pedalboard is more precious than a piece of land on a paradise beach somewhere. This is because every time you move it around and occupy the stage with it, you have to try and cover as much sonic ground with it as possible without breaking your back (or the bank).
Most of the legendary pedals in the market have a smaller version. For example, when I swapped out my Russian big-black-box Big Muff for the new, smaller version, I could add an octave pedal and it opened many more sonic possibilities.
So, remember, pedalboard real estate is precious.
Mind Ergonomics, You’re Human
Do you like operating your Wah pedal with your right or left foot? Moreover, with what leg do you tap your tempo, work your looper, or engage your distortion?
Well, you’ll make your life easier and flatten the learning curve for your new pedalboard if you plan ahead for these kinds of things. For example, I like operating my Wah with my right leg but I also like using that leg for the looping pedal. Therefore, both of them are conveniently placed on the right side of my pedalboard.
Mind the ergonomics, you’re human after all, right?
Try Everything Plugged In
This is a huge one I wish someone told me about before. I remember it very clearly; I made my first pedalboard literally out of a plank of wood I had cut to a specific measurement. When I got the board home and started working on the pedal attachment, I realized I had no room for audio or power cables! It was a nightmare come true.
So, don’t make the same mistake I did, and make sure you leave enough room for audio and power cables as well as a power supply if you’re using one.
2. You Don’t Have a Buffer (or Two)
Buffers are the unsung heroes in guitar pedal history. But hey, don’t look at me like that, they’re there for a very good reason.
Yes, I know, spending money on buffers instead of on that guitar synth pedal that looks amazing isn’t my idea of fun either. But once you hear the difference buffers make, you won’t regret buying them either.
What Are Buffers?
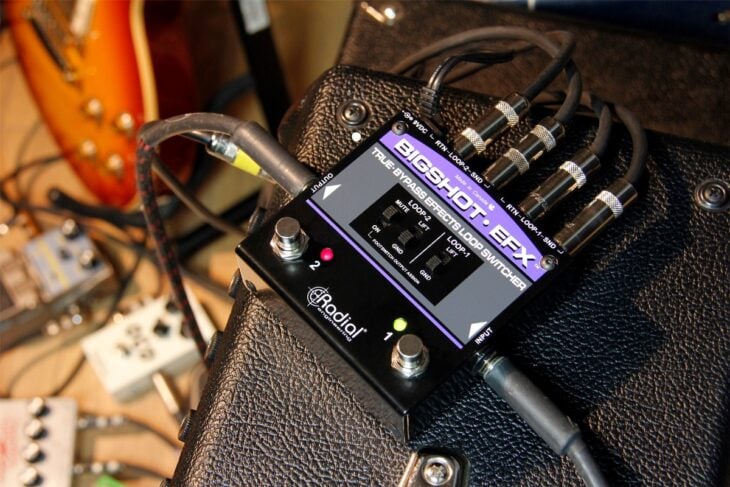
Technically speaking, a buffer is what you call a unity gain amplifier circuit. This means that it makes your guitar pickups think they’re connected to a guitar amp straight. Your guitar signal meets a 1 meg input impedance and the buffer then turns it into a lower impedance of 100 Ohms.
So, in summary, a buffer is a small device that keeps the impedance levels to those of a real tube amp despite you’re going into other kinds of devices. This way, it’ll get the best out of your guitar’s pickups and tone.
Why Do You Need Them?
Let me list my three top reasons why you should get a buffer (or two) for your new pedalboard.
- When the magnetic pickups of your guitar don’t meet a 1-meg resistive load, they don’t perform at their peak. This means that some of the treble response and natural brightness might be rolled off from your signal. This translates into a dull, lifeless guitar sound.
- If you use a long guitar cable to go to your first pedal, you’ll be losing some signal along the way. Nevertheless, when that signal meets the 1 meg impedance of the buffer all that loss is restored, improving definition and clarity.
- After going through a long effects chain, you have the same tonal degradation named before. If you add a second buffer at the end of your pedalboard chain, you’ll make sure the guitar sounds as if it was plugged straight into the amp but with more tonal capabilities.
3. No Gain Staging Plan
Let’s just face it, there’s no way you can have just one dirt pedal on your board. I mean, I have been playing through an overdrive and a distortion pedal for the past 20 years or so. Moreover, that’s the most common scenario for those of us who can’t afford to play exclusively to the breakup moment of our tube amplifiers.
If you’re not staging your gain, which means playing both pedals engaged at the same time, then there’s no need to worry. On the other hand, if you’re playing one pedal into the other both being on, you have to pay close attention to these two scenarios.
Bear in mind this is not a “right vs. wrong” kind of thing but just different possible scenarios that can occur.
The Overdrive into Distortion Scenario
This is the way I’ve used these pedals all my life until very recently. I own a couple of Tube Screamers (the TS-9 is my always-on pedal) and I have a distortion and a fuzz, a Tech 21 Double-Drive, and a Big Muff π. I go from the Wah to the TS then to the distortion, and then to the fuzz. Yes, I’ve used them all together and it’s what I call “fun at mayhem levels”.
But with this layout what I get is my distortion to sound more broken, less musical, rawer, and menacing. This is because I’m hitting a hot pedal with an already hot signal.
If that’s what you’re trying to achieve, then this is the path.
The Distortion into Overdrive Scenario
When I flipped the order of my pedals around and started it all with my Big Muff, I noticed that the tone and character of my distortion and fuzz pedals were clearer, cleaner, and more defined. Yes, I lost some of the mayhem element (Tyler Durden didn’t like that) but my distortion was more musical, Hi-Fi, creamier, and rounder.
If that’s the tone you’re after, then this is the path.
PRO TIP: My suggestion is you experiment with both approaches until you find the sound you like the most.
4. Not Leaving Some Room to Grow
This is a huge one that cost me money many times.
I know, we all think we’re touring musicians in a worldwide famous band who put out a record, rehearse a show, and play 200 dates around the planet with a defined pedalboard, specially tailored for that performance.
Well, if that’s you; my kudos my friend.
The truth is, most of us don’t share that scenario. On the contrary, we have to use the same pedalboard for all the multiple uses we give our guitar. That’s jamming with friends, playing live, hitting the studio, and even teaching sometimes.
In that scenario (the most common for all of us) you need to leave some room to grow because your taste, playing style, and budget are not static but dynamic. Yes, our ears grow and evolve (not literally, of course, I’m no Mr. Spock) and you begin to develop new needs you want to fulfill.
Leave room for an extra pedal you can just throw in at any time to try out.
Not doing that cost me having to move to a new board more than once in my musical career. So, don’t make the same mistake I did.
5. Adding Unnecessary Pedals (Getting a Wrong-Sized Pedalboard)
This is something that happened to me a very short while ago. It was my birthday and I decided to give myself a brand-new pedalboard in gorgeous surf green as a present because I wanted to expand my current setup a little.
I made a mistake with the measurements and ended up having a much bigger pedalboard than I wanted. This meant more real estate to fill with grown-up toys.
Soon, I realized it had been a double mistake because I ended up having a pedalboard that’s too big and heavy for most stages. Moreover, I added pedals that I don’t really need. So, I’m taking devices from my studio on the road just to get some dirt on (and eventually some beer too).
Bear this in mind, if you have too much room in your pedalboard, you’ll end up filling it up with unnecessary devices. It’s just the way the human mind works!
Don’t worry, this can be avoided by following the first step thoroughly.
6. Disregarding the Essentials
This is another step that got me into many problems in the past. Furthermore, I’m going to say that, along with the buffer situation, it’s the one that took me the longest to understand.
Most of us go after the fancy pedals, the cool gizmos, and the latest noise generators and expect them to perform at their peak at all times. Yes, we just plug them in and expect them to perform flawlessly without doing much.
Well, in my case (and maybe yours too) I was disregarding the very basics and investing my money in the wrong products.
How so? You might be thinking. Well, unless you have quality cables and a high-quality power supply, your pedals won’t behave the way they should at the peak of their performance.
For example, if you don’t have an isolated power supply or are using a daisy chain and those pedals that consume more voltage are not getting what they need, you might experience bad audio or signal loss.
So, my advice is to separate money to buy a good power supply and great cables before you blow all your budget on cool tap-tempo tremolo pedals and state-of-the-art reverberators.
Let’s Talk Power Supplies
What is the kind of power supply you need for your pedalboard? Well, I would say in this day and age, an isolated power supply is a must to avoid unwanted noise. But let’s take this a little further; the power supply world divides, roughly, into two big groups.
Analog Linear Power Supplies
These power supplies have been the industry standard for decades. They operate on toroidal transformers and are great at delivering isolated power to each outlet and rejecting noise coming from outlets. On the not-so-good side, they can induce noise if you place a pedal right on top of it and are usually bulkier.
Three great-sounding examples:
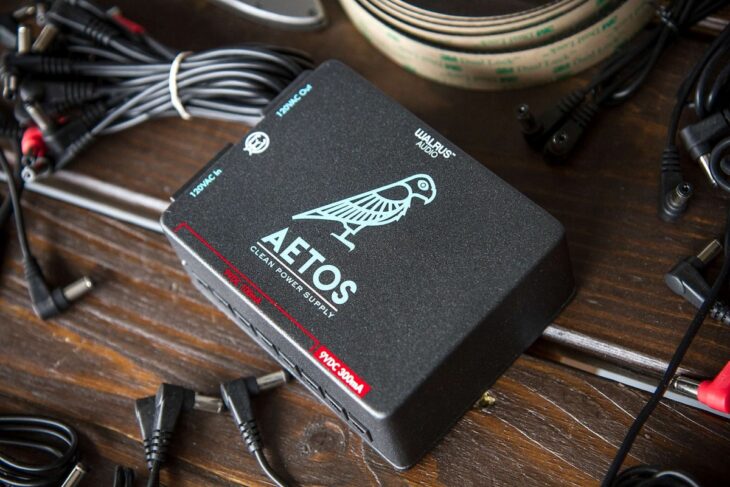
Digital Switching Power Supplies
Power supplies in this category represent the new technology that came to change the game. They tend to be lighter, smaller, and more powerful than analog ones. Instead of using a toroidal transformer, they run a high-frequency oscillator out to miniature transformers that push the isolated power to each of the outlets.
Although they’re not as great at rejecting noise, they don’t induce any unwanted proximity noises. This means you can place it under any of your pedals and it won’t bring any extra noise. Plus, with their reduced size and weight, they make perfect under-the-hood power supplies for your pedalboard.
Three great examples:
7. Let’s Talk Routing
Do you know what happens when power cables and audio cables get mixed? Moreover, have you got any vintage pedal on your board that works with AC current?
Well, taking into account the routing of the cables is paramount for a great result. So, if you have DC current cables running, you can use them parallel, above, or below the audio cables and nothing will happen.
If you have AC power cables around in your pedalboard, on the other hand, what you have to do is run them as far away from your audio cables as you can. This way, you’ll make sure no noise is coming from that source into the audio coming out of the speakers.
Finally, if they absolutely need to cross each other, they need to do it perpendicularly. This means at a 90-degree angle.
8. You Don’t Know Enough About Your Signal Path

There’s one thing you have to know about pedals: they work as a chain in which the previous link feeds effected audio to the next link. In this scenario, placing your delay before and after your distortion pedal can take you to two very different results, not only audio-wise, but also playability and feel-wise.
Let me clear out one thing before I recommend a layout or pedal order. There’s no right or wrong here. Furthermore, the “wrong” approach can take you to a new sonic territory you might find inspiring, weird, fun, or all of the above.
So, this is not written in stone by any means, it’s just the layout that has given me the best results.
A “Correct” Signal Path by Pedal Category
- IMPEDANCE-SENSITIVE DEVICES – These might be vintage pedals, anything like old Wahs, old fuzz pedals, and anything with germanium or silicon transistors, including treble boosters. You need to put these devices before the initial buffer because they don’t react well to them.
- INPUT BUFFER – Manages the pickup loading (makes the pickups think they’re connected straight into an amp) allowing a 1 meg input impedance for optimum performance. Also, the buffer converts that into a low-impedance signal, something around 100 ohms.
- DYNAMIC PEDALS – These are pedals such as compressors, filters, and octave pedals. They are very reactive to the picking hand and dynamics, therefore, need to be early on in the chain to get the most real tone possible.
PRO TIP: If you have a touch-sensitive overdrive pedal and you want to retain that quality, you don’t want a compressor squishing the signal before it. In that case, you can try it afterward. If you’re never using them together, then there’s no need to worry.
- OVERDRIVE/DISTORTION – If you’re not stacking them, then there’s no preconceived order you should use them. On the contrary, if you’re using several of them ON at the same time, then we already addressed the consequences of pedal order above.
- BOOST/EQ – Adding these pedals after the OD and distortion pedals allows you to just increase the volume or output of an already great-sounding signal. Otherwise, you’d be changing the tone of your OD and distortion pedals. Finally, with the EQ, you can fine-tune the tone before it hits the amp. If you’re using an EQ and a boost pedal, I would use them in that order.
- VOLUME PEDAL – There are several ways to use a volume pedal. First in the chain is the way to replicate your guitar’s volume control; lowering it lowers gain instead of volume. In other words, it reduces or increases gain and cleans up the signal. If you use it here, on the other hand, it transforms into a master volume that won’t affect your gain.
PRO TIP: Your guitar already has a volume control. If you learn to master that one, you can benefit greatly from having a master volume in the shape of a pedal.
- MODULATION – Placing modulation pedals here is a matter of taste. You can use phasers, Uni-vibe, and Flangers before the distortions and overdrives. Others like tremolo and chorus might work better after the distortion. Nevertheless, the choice is yours to achieve the type of effect you’re after. I like them here best, but I suggest you try both ways.
- TIME-BASED EFFECTS – I’m talking about Delay and Reverb. You can use them in that order or you can use reverb first and delay after. The difference is that you can either apply the reverb to the delay repetitions or have the delay repeat a signal with the reverb applied. This has an amazing effect on settings like “shimmer”. Nevertheless, it’s also a matter of personal taste and tone pursuit.
- OUTPUT BUFFER – After going through all those pedals, you need a buffer to restore signal quality. Ideally, your buffer has a 1 Meg input and a 100 Ohms output. The signal will reach the amplifier without any sonic consequences.
9. You Don’t Watch Out for Impedance-Sensitive Devices
Impedance-sensitive devices literally change the way they sound when hit with a buffered signal. For example, if you spend a good amount of money on a 1968 Thomas Organ Vox fuzz pedal to have that mosquito-attack sound The Beatles made so famous, you need to mind that pedal especially.
Put these pedals before the buffer at the beginning of your chain.
Check how they react with your power supply; you might need to run them on batteries.
Finally, make sure to put a buffer after them since they can take away some signal when going through their circuits.
10. You Don’t Take Risks and Just Try Stuff Out

The final item on this list, and in my opinion, the biggest mistake of them all is not trying stuff out and breaking the rules to push your sonic boundaries further. I mean, as I said before, the way you arrange your pedalboard makes a big difference in the resulting sound. But nothing is written on stone.
On the contrary, these are the unwritten rules decades of guitar playing through pedals gave me but feel free to bend them, break them, and come up with some of your own. Maybe you achieve a new, groundbreaking sound that’s super cool and takes your musical project to the mainstream.
So, take risks, try stuff out, and don’t be afraid to walk into unknown territory. Believe me, you’ll have a ton of fun and might even create a signature tone everybody else will want to replicate.
The Bottom End
I speak for myself but think every electric guitarist in the world has played or will play through one or several pedals throughout their careers. Learning how to get the best out of them at all times is a must.
Apply my unwritten rules and let me know in the comments if it helped you fix any issues you were having with your fantastic pedal platform. Also, did I miss any tips you’d like to add? Feel free to tell me in the comments; you might be helping fellow players too!
Happy (pedal – pedal – pedal) playing!